Last night I grabbed an hour while RAR was asleep and managed to finish the mash tun build.
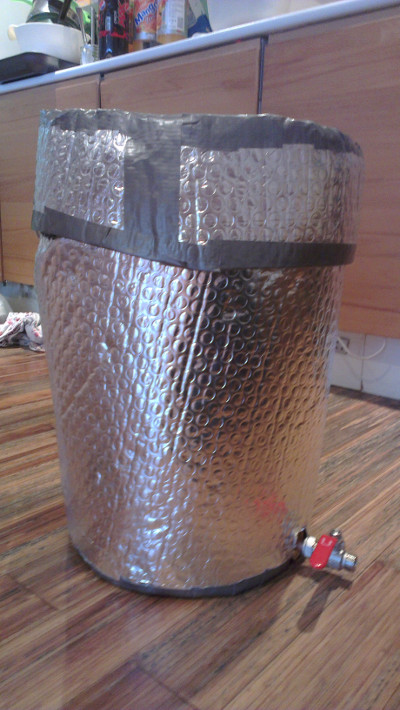
The first part was relatively easy; fitting the ball valve tap. Obviously I don’t want the wort just pouring out of the bottom of the tun, so I needed a way to keep it all in and control what comes out, and how fast it does. This is important for things like controlling first runnings to pour back through the grain bed. Using the same compression fittings I used to plumb the pipe through, I attached the 15mm ball valve tap I bought from B&Q. I do have a 15mm female compression elbow to fit at some point, to redirect the flow downwards, but at the moment when it’s fastened tight it points to the right – not ideal.
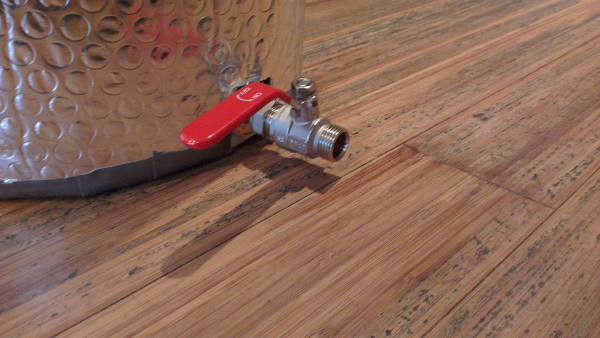
Ball valve tap attached with compression fittings.
After I finished insulating the body before, all I had to do was make sure the rest of it was properly insulated, so that when I start mashing grain it holds temperature as best it can. The first, easy part was adding more of the insulating wrap I’d used for the rest of the build to the lid.
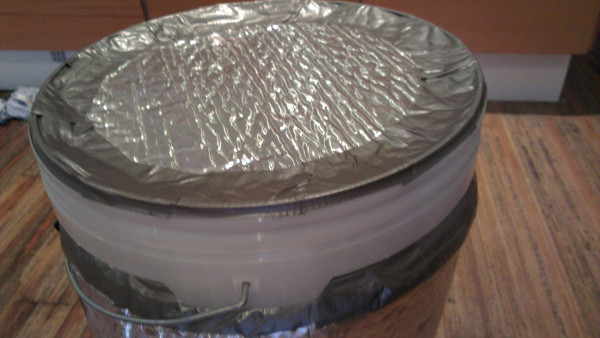
It’s not the prettiest, but it’ll do the job.
On the original Instructable that I’ve been following for the most part, the author found that he had a few inches of the internal fermenting bin sticking out of the top once it was put inside the main tun. That meant he was able to wrap more insulation around that exposed area to minimise any heat loss, so I thought I’d do the same thing. Except there was a problem…
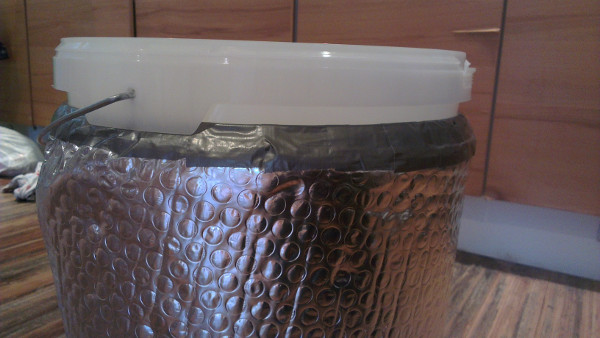
Very shallow overhang when the internal bin is in place.
As you can see from the photo above, when my mash tun is assembled, there’s very little overhang exposed. This is both good and bad at the same time. Good in the sense that it means heat loss is lower, but bad because it gives me much less to work with to insulate it. By the time I wrap insulation around it, there’s almost no room left to attach the tape. The other problem is that I wanted to keep the handle attached to make it easier to remove the grain and clean it afterwards.
After a quick think (aided by a bottle of London Pride) I came up with a plan for a basic thermal cap. Think of it as a woolly hat for my brew. It’s a bit rough-and-ready, but it’s a good size and fit, and can be put on without needing to remove the handle.
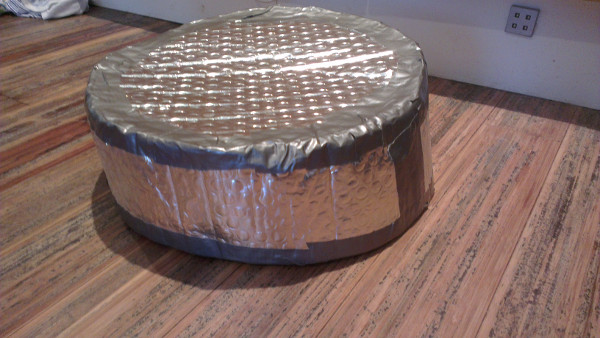
Shiny! My mash tun’s warm hat.
So there we go, it’s finished! I’ve done a couple of quick tests for leaks, which have all been good so far (no drips anywhere!), and once I get a decent thermometer I’ll do some tests for heat retention, but all being well, I’ve finished.
Completed mash tun
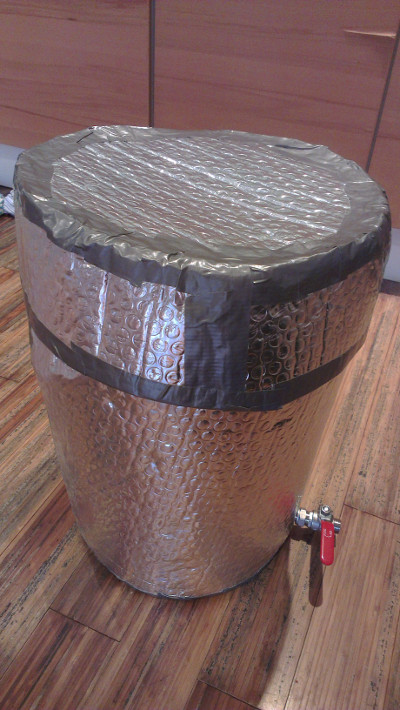
…and another picture of the completed tun.
It’s taken a couple of weeks to do what I could have done in a day or two if I didn’t have a little boy invading every corner of my life, but to be honest, I quite like the slow build. There’s no rush after all, and I don’t even have a boiler yet. The longer I wait, the more time I have to decide what I’m going to brew, and how to do it. That said, I can’t wait to taste the first pint.
172 Responses
スーパーコピーブランド
日本シュプリーム コピー財布激安通販ショップ,luxurysjp2023 最速商店のスーパーコピーSupreme N級品!シュプリームスーパーコピー激安, シュプリーム偽物代引きN級品優良店!シュプリーム レプリカ,シュプリーム財布コピー,シュプリームバッグ ,シュプリーム財布コピー、2021新品シュプリームスーパー。
Gucci siêu cấp
ブランドコピー正規品と同等品質スーパーコピー通販人気激安店luxurysjp2023 ,国内最大の偽物ブランド,一番安い価格でお客様に提供します … ブランド スーパーコピー シュプリーム SUPREME コピー 通販 販売のバック,財布,服,靴,ベルト,ジーンズ, マフラー,スーパー コピー 服.
DIOR siêu cấp
supreme服コピー通販,シュプリーム 服 コピー,luxurysjp2023 シュプリーム服コピー激安シュプリームスーパーコピー服メンズTシャツ通販老舗!2021秋冬新作大人気のルイヴィトン&シュプリーム服コピー,シュプリーム服コピー,グッチ服コピー,シュプリーム コピー パーカー, SUPREME スーパーコピ.
Louis Vuitton siêu cấp
シュプリーム リモワ 偽物,supreme(シュプリーム)コ,luxurysjp2023 弊社はシュプリームスーパーコピー代引き、シュプリーム コピー通販安全を満載! 2021新品シュプリーム財布コピー,シュプリームパーカーコピー,シュプリーム 半袖Tシャツコピーのシュプリームコピー商品販売,シュプリームレプリカ,最高品質.
Louis Vuitton siêu cấp
シュプリーム リモワ 偽物,luxurysjp2023 supreme(シュプリーム)コシュプリーム パーカー コピー,supreme コピー 激安通販,シュプリーム リュックスーパーコピー,最新シュプリーム …シュプリーム財布コピー、2021新品シュプリームスーパ弊社はシュプリームスーパーコピー代引き、シュプリーム コピー通販安全を満載!
Balenciaga siêu cấp
当店はルイヴィトン シュプリームコピー専門店、luxurysjp2023 業界最高N級品シュプリーム スーパーコピー(N級品),シュプリーム スーパーコピー激安偽物、シュプリーム コピー メンズ・レディース海外通販、2021新作Supreme偽物販売中!100%品質,シュプリーム コピー パーカー, SUPREME スーパーコピ.
Gucci siêu cấp
シュプリーム 偽 通販 | Supreme 衝撃の激安価格,luxurysjp2023 Supreme 最安値挑戦!クーポン利用で更に割引も、衝撃コスパ Qoo10。毎日更新!今日の特価商品・当店はルイヴィトン シュプリームコピー専門店、業界最高N級品シュプリーム スーパーコピー(N級品).
Gucci siêu cấp
シュプリーム 偽物,luxurysjp2023 シュプリーム パーカー コピーSupreme,Supremeシュプリーム の商品. ロエベ ハンモック · ディオール トートバッグ · Supremeシュプリーム · シュプリーム | -韓国ブランドスーパーコピー専門店,LOUIS VUITTON ルイヴィトン 新作 財布,supreme コピー バッグ – ブランド コピー, スーパーコピ.
DIOR siêu cấp
シュプリーム パーカー コピー,supreme コピー 激安通販,luxurysjp2023 シュプリーム リュックスーパーコピー,最新シュプリームスーパーコピー シュプリーム 偽物激安專門店,シュプリーム 半袖Tシャツ偽物 通販 ,SUPREME 偽物激安,ブランド スーパーコピー シュプリーム SUPREME コピー 通販 販売のバック,財布,服,靴,ベルト,ジーンズ, マフラー.
Balenciaga siêu cấp
シュプリームスーパーコピー激安偽物luxurysjp2023 シュプリーム ルイ当店はルイヴィトン シュプリームコピー専門店、業界最高N級品シュプリーム スーパーコピー(N級品),シュプリーム スーパーコピー激安偽物、シュプリームコピー メンズ・レディース海外通販、2021新作Supreme偽物販売中!100%品質.
スーパーコピーブランド
シュプリーム コピー パーカー 偽物_スーパーコピーブラ,luxurysjp2023 vogcopy.net(フクショー):シュプリーム偽物品スーパーコピー安心品質SUPREME ブランドコピー入手困難アイテム激安販売。2021評判高い春夏半袖tシャツ、秋冬新作パーカーコレクションを海外通販。
Gucci siêu cấp
高級本革の上質なスマホケース | luxurysjp2023 大人気の季節限定カラー発売中,iphone ケース カバー_シュプリーム コピー パーカーiphone ケース カバー:KIDYING.COMでは人気シュプリーム コピー品.海外大好評シュプリームスーパーコピー2021激安新作を安価で消費者に提供しています。 品質保証でHOT100%新品のシュプリーム パーカー 激安.
スーパーコピーブランド
2021最高級韓国スーパーコピーブランド専門店,luxurysjp2023 韓国ブランシュプリームベルトコピー,supreme(シュプリーム)コピ当店はルイヴィトン シュプリームコピー専門店、業界最高N級品シュプリーム スーパーコピー(N級品),シュプリーム スーパーコピー激安偽物、シュプリーム コピー メンズ・レディース海外通販、2021新作Supreme偽物販売中!100%品質保証、全品送料無料!
Balenciaga siêu cấp
シュプリームコピー新作激安販売店,最高级シュプリーム2021 luxurysjp2023 新作supreme スーパーコピー 服高品質 ,シュプリーム コピー Tシャツ , シュプリーム【SUPREME】 スーパーコピー 専門店 … スーパーコピー シュプリーム SUPREME コピー通販販売のバック,財布,服,靴,ベルト,ジーンズ, マフラー。
Gucci siêu cấp
シュプリームコピー新作激安販売店,最高级シュプリーム ,luxurysjp2023 安い,シュプリームシャツ激安,シュプリームシャツコピー,シュプリームシャツ通販,シュプリームシャツ本物,supreme スーパーコピー … ブランドコピー 代引き国内発送-ルイヴィトンブランドスーパーコピー通販優良店スーパーコピー安全口コミ後払い 弊社は安全と信頼.
Louis Vuitton siêu cấp
supremeバックコピー、luxurysjp2023 supreme パーカー コピー激安、supreme iphoneケース カバーコピー、 シュプリーム キャップコピーなどの人気アイテムがお得安い。VIPセールで最上質な人気商品を,iphoneケースブランドコピー激安後払い代引きiphoneケ.iphoneケースブランドコピー激安後払い代引きiphoneケース手帳型スーパーコピースマホケース!
Gucci siêu cấp
韓国最も人気のブランドコピーN級品通販専門店、luxurysjp2023 スーパーコピーロレックス、 ウブロ、パネライ、ガガミラノ、ルイ … シュプリームスーパーコピー_ SUPREME偽物通販,ロレックスコピー販売,ブランドコピー最高級ロレックススーパー.
Louis Vuitton siêu cấp
(激安)シュプリーム パーカー コピー | luxurysjp2023 激売れ人気アイテムランキング,ブランド コピー 販売 店_シュプリーム パーカー スーパー最人気セール中シュプリームコピーsupreme ボックスロゴパーカーコピー。芸能人おすすめsupreme ジャケットコピー 、 supreme.
Louis Vuitton siêu cấp
スーパーコピー シュプリーム SUPREME コピー通販販売のバックluxurysjp2023 ,財布,服,靴,ベルト,シュプリーム コピー,シュプリーム ヴィトン 財布 偽物,シュプリーム財布偽物, supreme 財布 コピー,シュプリームコピー財布,シュプリームバッグコピー.
Louis Vuitton siêu cấp
シュプリーム財布コピー、Supreme偽物、luxurysjp2023 最高級シュプ日本シュプリーム コピー財布激安通販ショップ,最速商店のスーパーコピーSupreme N級品!シュプリームスーパーコピー激安, シュプリーム偽物代引きN級品優良店!シュプリーム レプリカ,シュプリーム財布コピー,シュプリームバッグ.
Doll Necklace
Leading Provider Of Large Silicone Molds For Woodworking & Resin Art. Big Silicone Charcuterie Board Molds & River Table Forms.”wwwsentro-knittingmachinecom_2023″ Get the best deals on Craft Resin Molds & Supplies and find everything you’ll need to…
how to cast off sentro knitting machine
6.Finishing: Once the desired length and shaping are achieved, you’ll need to finish the hat by casting off the stitches.”wwwsentro-knittingmachinecom_2024″ This involves removing the stitches from the machine and securing the yarn to prevent unrave…